Wednesday, December 24, 2008

Wisdom over pride

Well, my goal was to drive this project over the Sierras to Fallon for Christmas.
Since starting this project at the end of October, with all the days I had other stuff going on, I figure I lost about 20+ working days.
So I wasn't able to finish it in time for a confident drive in the snow.
I got it started and running great but heater wasn't in, hood not on, no bed of any kind, and a few other assorted important items.
So rather than end up cold/wet, cramped, and tired from staying up all night working on it, I opted to choose wisdom in using a known good rig over my pride of driving something that wasn't yet proven.

So thanks to our REALLY good friends Herb/Charlie, we borrowed their 4x4 suburban and spent 6 hours and 350 miles getting to Fallon by way of Redding...(to pick up Amy's sister Jenn as a surprise for their parents)
Trip was in 4x4 from almost Redding to just past Susanville.

When we get back home I'm going to add a video of it running. I ran it for 10-15 minutes Tuesday but then it started coughing and finally died and wouldn't restart.
Later that night I figured that there wasn't anything wrong and I bet I just ran out of gas... LOL

Monday, December 22, 2008

radiator day

Today was radiator day.

First I replaced the serpentine belt which according to kragen and any other place-doesn't exist for this base rig-VIN and door tag says its a 1980 jeep cherokee 4.2 FLAPS say it has V-belt, my eyes tell me serpentine. So finally I got the part number off old belt and it appears to be a 1981...

This is my lower radiator hose-1 modified and 2 stock 1 1/2" copper plumbing fittings, 6 hose clamps and a partridge in a pear tree...
looking up from below;

Down from top;

This took a lot of work-thanks to Del Carlos radiator shop here in town-its ready to install. I made the shroud and fan mounting, can you spot the differences between stock and modified radiator? D you know what this radiator fits?

Its close but it does clear. And its HEAVY! I think I pulled it in/out maybe 50-60 times checking for fitment. Full of water(for testing-antifreeze is EXPENSIVE!)

I am using the jeep gauges stashed behind the dash until I can afford to have custom OEM-look ones made.

The devil and the aftermarket(or the saga of the rear glass)

The day started out great with my smart wife's great idea to take advantage of the last sunny day of the year and go out to 'storage' to grab a bed for this monster.
2-3 hours and it was on the road again. Amy worked super hard-Love you too honey!


Then the window...
background-ordered 2, got 3.. or 1 plus 2 pieces-worst packing job ever...
so they sent me a new one-I left it in wrap but single item in big box is storage pain so I grabbed it to install on sat... got it cut out of bubblewrap, lifted into place and noticed it said tempered.
not a big deal right? well, I ordered laminated like OEM-i like it better for lots reasons... its the back window so if a something bounces and whacks it-at least I drive home dry and warm instead of crumble.. anyway..
I held it up and it was 6" long and 2" too short...
they sent me the wrong one!. lucky for me I got 2 and 1 was right and here...
BTW-it came from Taiwan-really. they cut it in Taiwan, shipping it across the Pac, loaded on truck, warehouse to warehouse... to store, to mail to me.. and its still $20 cheaper than local glass guy wants to charge me?
BUMMER!
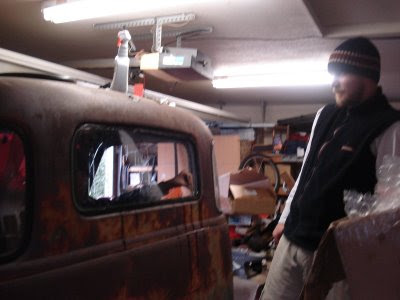
so after trying to follow OEM manual and getting nowhere with that-buddy Fritz stopped by and with him and Amy-we worked about an hour to install 1 piece of glass. PITA!
then the real pain-there is the locking strip to hold the glass firmly in the rubber....
OEM manual shows this neato wire tool with wood handle and the strip feeding through it...
well, the re-pop tool isn't wire-its stamped flat plate and too big so it doesn't fit in the groove like its supposed to($12 down the drain)

second-the insert rubber with fancy chrome look is NO WHERE NEAR..
let me repeat that;
NOWHERE NEAR the correct OEM size or shape. (guess whos getting their chrome back?) so after 3+ hours(NOT kidding) of 3 different people, various fun and not fun implements-this is how much locking bead got installed;

you saw that right?-its about 3 inches... and theres not enough hours between now and wed to get it done at that rate. I've got a welder and some sheetmetal-who needs a window back there anyway...?
-Amy spent about 6 hours today with a different locking bead and got the whole top and half down both sides. her hands hurt, she got blisters and she cant feel her arms.
yep-OEM fit, designed to perfection.
and no-it doesn't matter who I order from-its all the same Taiwan factory. I'm screwed. the old rubber was so hard I couldn't cut it-really. I chipped it out with a screwdriver and it shattered the rubber(glass was already broken.)

working rather than posting

well over the last few days I've done a bit of this and that.
wiring in sorta place and untangled, some weatherstrip sorta installed. rant another day...
shifter and steering column in with all acc and other links hooked up....

need battery to test things so made a dual battery setup under the floor like stock.
can fit 2-4 batteries depending on size-i know-overkill right?
but thanks to a few friends, i had plenty of extra material, enough room and a welder...

so now the headlights work after a lot of practice running and drilling new holes for jeep wiring.. have to see(or not be able to see) in person... and tail lights too.

Tuesday, December 16, 2008

Assembly comences

Well good or bad-here goes.
got the messed up firewall brace(my error) modified and ready to install, the brake pedal and booster installed and the steering column with shifter and misc parts put together with new upper-chevy and lower-jeep bearings. New seal and plate for the column where it goes through firewall.

The column is attached and I can use the steering wheel to turn the wheels now. all that is left is to tack a small tab to the shifter rod and cut notches for PRND21

The carb is bolted down for the last time and apart from mod a bracket for more clearance-all i need for fire is fuel and radiator. Got the shroud bent today-one more step....

Saturday, December 13, 2008

Help painting

So had Peter my brother and his fam up for the weekend.
He helped a TON by holding a backer while i welded holes shut in the firewall, bolting fenders on, grinding out my scabby welds smooth, cleaning and prepping the cab for paint and emptying 2 of the 4 cans of spray paint in the cab.

this is after the second coat of rustoleum hammered silver spraypaint. much better in person.

We knocked off early, grabbed some chinese and drove around to look at lights...

sandblasting

Evidently Tues. I got something in my eye. Wed. I sandblasted and this is after my escape from inside the cab blasting.

So after several hours of blasting and escaping-after the dust cleared this is sorta what it looked like.

On Wed night my eyes were still bothered and I found metal in my eye. Thurs morning I went to eye doc and he pulled chuck out and ran a drill into the hole in my eye to clean out the rust-seriously-he drilled my eye.
Friday morning I had a test and its finally on its way back to sorta normal.

Unfortunatly poor parts

So I had to order some patch panels for the truck. Had to get both sides from rust due to farmer stuffing rags down behind seat.

test fit

And this is the result of an inferior product.
I expected the patch panel I got to at least sorta look like the metal existing on the truck.
unfortunately_i was wrong.
The panels not only don't fit the truck even very close, they aren't even a mirror image of each other.
they both were also lacking a key feature of the truck-a punch-down at the bottom to allow both for moisture drainage(to prevent rust again) and for airflow-an advertised design feature specifically for these trucks.
So i carved out a piece of 2x4 and made my own redneck punch-outs.
So sad.
but faster than trying to send them back and get the exact same part from a different vendor who sources from the same place.
ARGGHH!!!

Tuesday, December 09, 2008

radiator

Well the past few days were spent in susanville where it is cold! Its cold here too-took me a long time to get started today.

Mondays seem to suck all my attention and I never get what I want done. between bills, property management and various and sundry other business hours junk-I lost a whole day. BLECK! =(

Today I picked up my highly modified radiator. well, moderately modified, I mean modified just a little bit.
I had a 47-55 GMC radiator laying around-no idea where it came from so I dropped it in and it gave me more engine clearance-enough to fit fan behind rad!
Jeep water inlet is on side of rad-OEM is in center so I had rad shop swap the two and test it. its perfect-no leaks he says.
I made a simple flat as possible shroud to pull max air and mount fan.

fan to pulley clearance is much more than it appears here-its actually closer to 3/8 of an inch. LOL!

Friday, December 05, 2008

got a few things finished up yesterday.

this is the parking brake adapter that lets me use the jeep cable system with the OEM pedal so it looks stock. (view from underneath drivers side front fender)

no picture but I had a gmc radiator layin around that I'm going to have modified ($35)and make fit. gonna swap the filler and the inlet to mate up with the jeep. I originally thought I had to buy a new ($375+)rad and have custom made but the GMC fits in there real nice and give me enough engine room to mount electric fan on side as puller. This will save me from having to mount in front of rad in pusher configuration which is %80 efficient compared to puller.
since I'm using OEM core-i need the max cool even though this 258(4.2) 6 cyl tends to run cool.

I spent a lot of time cleaning and prepping to get ready to sandblast/paint the interior. while cleaning out the doors(2 pounds of superfine norcal red dirt dust powder) I found a SUPER condition 1951 quarter. from other evidence-it appears this truck has been sitting in a field since 1961 or 1962... =)

free web counter

Wednesday, December 03, 2008

carb and park brake

this is a mockup of my shifter linkage. I had to get the end drilled in the hardened shaft to be able to bolt on my shifter arm. I'm using a tire iron and its some pretty hard stuff. that's a piece of tubing with an oilite bushing inside. Allows me to use the stock 3spd shifter to run the 727 automatic.

I had to modify the carb linkage as there's a combination link for the jeep that controls the tranny downshift that i had to keep(see black cable from acc pedal curving down to bracket below carb on right side of pic). this carb is far superior to the OEM 1980 carter computer junk but isn't stock.
will work great though-a little drilling, welding and grinding and i have my own link.

This is my solution to the parking brake.
the chevy pedal and arm will control the jeep cable system.
the park brake is inside the cab and swivels through the floor. there's a shaft that goes through the big hole and it will be pushing on the cable housing(reverse of traditional-pull on cable)
the cable end will go through my new keyhole in the floor and slide over into the slot.

the plate will use OEM bolt and will hold the cable in the slot while also providing reinforcement of the cable end. This spot in the floor is already double thick so this plate doesn't need to be too heavy. it also allows for removal of cable without cutting and lets me keep OEM floor setup and OEM jeep hardware without the UGLY 1980 pedal bracket on the side...
sneaky!